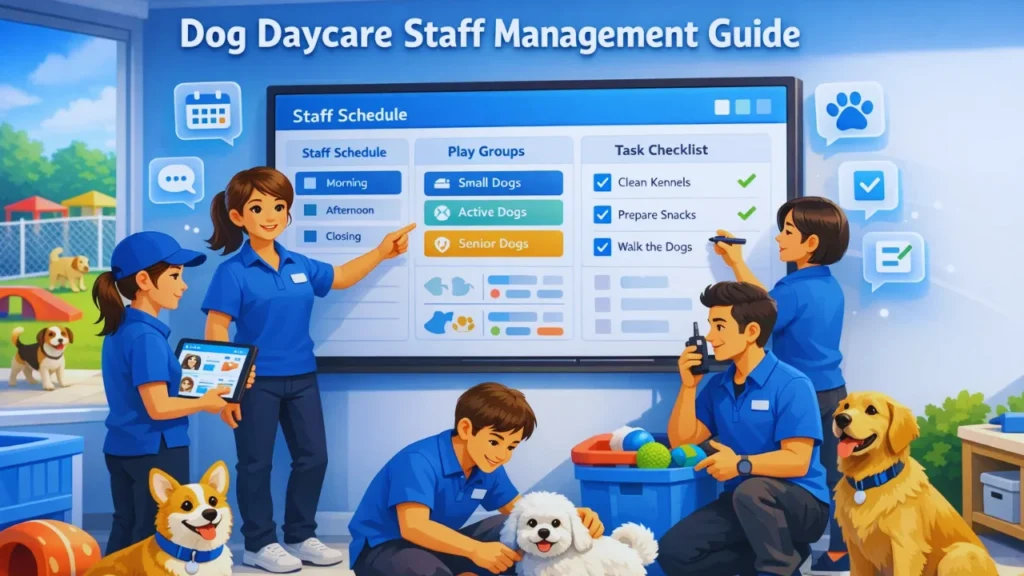
This guide explains how to protect your pet effectively by using a comprehensive system rather than a single product. We will cover the correct order for setting up a winter-safe space, step by step, so you can feel confident your pet is secure. If you follow this guide, you won’t need multiple articles to find the answers you need. You will learn the best ways to keep dogs warm in kennels and how to do so effectively in kennel environments.
Many pet owners believe that simply buying a heater is enough to protect their dogs from the cold, but proper winter safety is about the entire environment. Dogs lose body heat much faster outdoors, and when freezing wind is combined with moisture, it creates a real danger for any pet. Relying on improper heating methods is a common mistake that can lead to fire hazards or ineffective warmth.
What Every Winter Dog Kennel Needs
A warm kennel starts with a solid foundation based on two core principles. Cold air is the biggest threat during winter. It can quickly lower a dog’s body temperature. To avoid this, you must focus on blocking incoming cold air first. Your dog’s own body heat is actually the safest source of warmth. It poses no risk of fire or injury, unlike electronic heaters. No product or heater will work correctly without these basic steps in place.
Keeping dogs warm in the kennel during winter also requires a completely dry space. Moisture is just as dangerous as the cold. A damp dog will lose heat much faster than a dry one. It is why dryness matters as much as warmth for their safety. You should ensure the kennel stays leak-proof all season long. Understanding how to keep a dog warm in kennel settings begins with these simple concepts. By mastering these basics, you set the stage for a successful setup. Your pet will stay much safer and more comfortable throughout the winter.
Enclosing the Kennel (First Requirement)
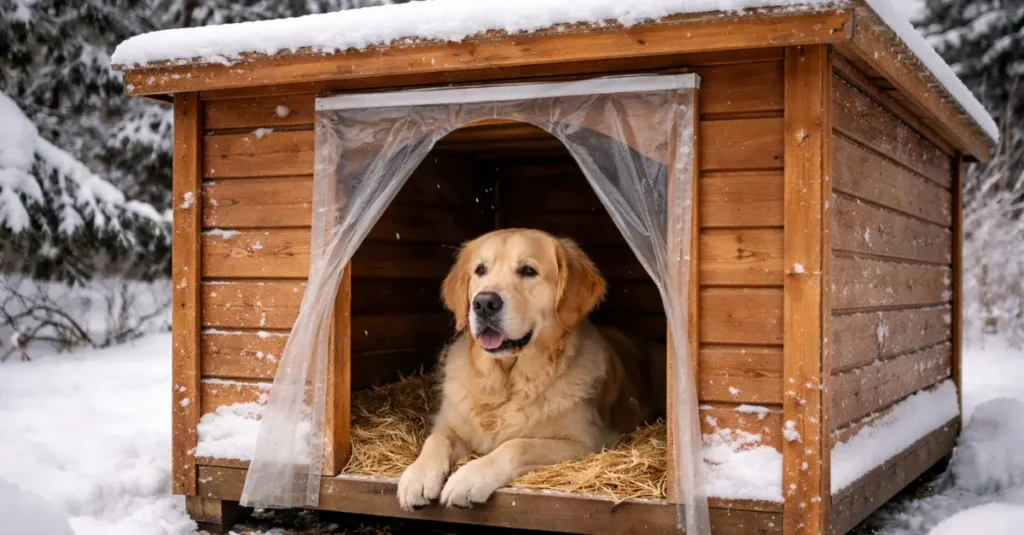
Before looking at heaters or pads, you must understand the concept of an enclosure. In winter pet safety, an enclosure is any structure that creates a solid barrier between your dog and the elements. Its primary job is to serve as a shield, effectively blocking out freezing wind, heavy snow, and cold rain. Without this protective layer, any other warming efforts you make will likely fail because the cold air will simply blow right through the space.
Open kennels often fail in the winter because they allow the dog’s natural body heat to escape immediately. When you learn how to enclose a dog kennel for winter, you are essentially building a “bubble” of protection that keeps the harsh weather out and the warmth in. It is the first and most critical step in understanding how dog kennels keep dogs warm in winter environments. This step will be explained in detail later in the step-by-step section.
Insulating the Kennel (Second Requirement)
Insulation is the second half of a warm winter kennel system. It is important to know that insulation does not create heat. Instead, it traps the warmth your dog already has. This heat comes from their own body. Without a proper enclosure, insulation is mostly useless. The cold wind will simply blow away all the trapped air. However, once the kennel is enclosed, insulation becomes essential. It creates a barrier between the cold outside and the warm inside.
Poor insulation is a significant cause of heat loss in winter. Thin walls allow warmth to escape quickly into the freezing air. When you learn how to insulate a dog kennel for winter, you are sealing in that vital heat. It keeps the interior temperature much more stable for your pet. A well-insulated house stays cozy even when the thermometer drops. It is one of the best ways to keep a dog kennel warm in winter. This step will be fully covered in the step-by-step winter kennel setup section below.
Why Enclosure and Insulation Must Work Together
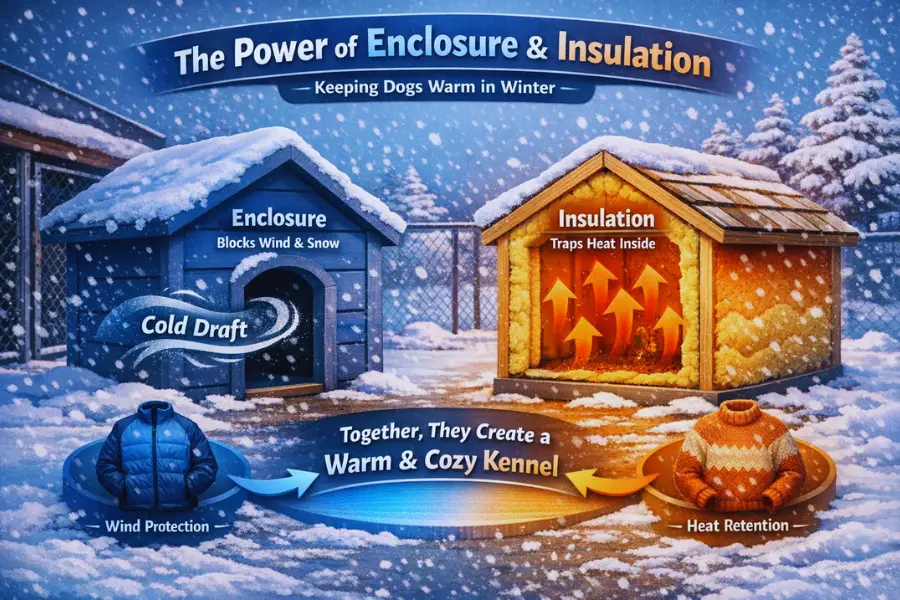
To master the art of keeping dogs warm in winter and in the kennel, you must understand that enclosure and insulation are partners. An enclosure alone is not enough to maintain a safe temperature. While it blocks biting wind and snow, it cannot stop heat from leaking through thin walls.
Conversely, insulation alone fails because even the thickest padding cannot stop an icy draft from a wide-open doorway. You must have both working in harmony to create a truly warm environment. When you combine these two, you make a powerful thermal shield.
Think of it like wearing a thick wool sweater on a windy day. The shirt is your insulation, trapping your body heat. However, if you don’t wear a windbreaker over it, the wind will blow right through the wool and chill you. In a kennel, the enclosure acts as the windbreaker, and the insulation acts as the sweater. This duo is exactly what you need to keep dogs warm in outdoor kennel spaces.
Step-by-Step Winter Kennel Setup
This section applies the core winter safety concepts directly to your kennel. By following these steps, you ensure your dog has a reliable shield against the frost. We will focus on practical actions that maximize safety and comfort. Each step is designed to work as part of a complete warming system.
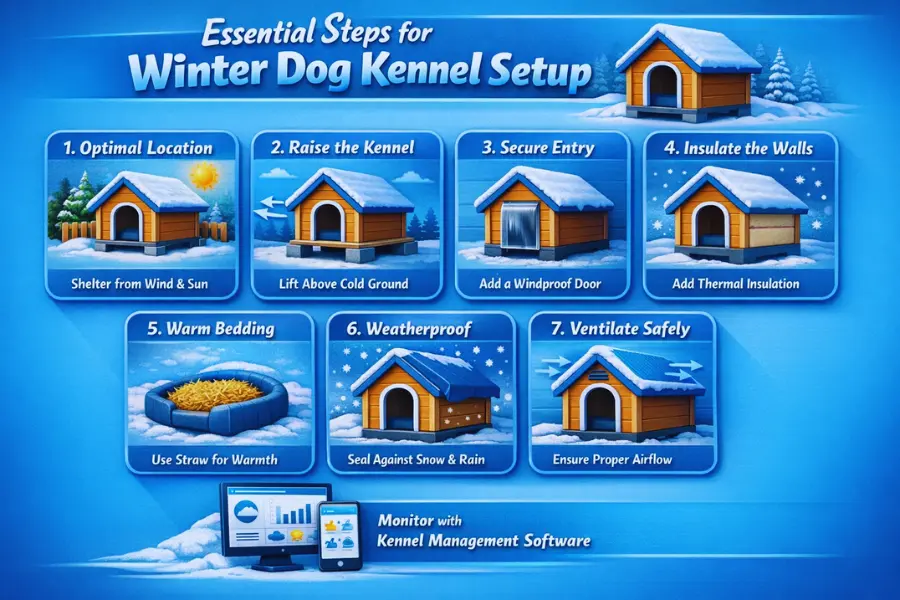
Step 1 – Choose the Right Kennel Location
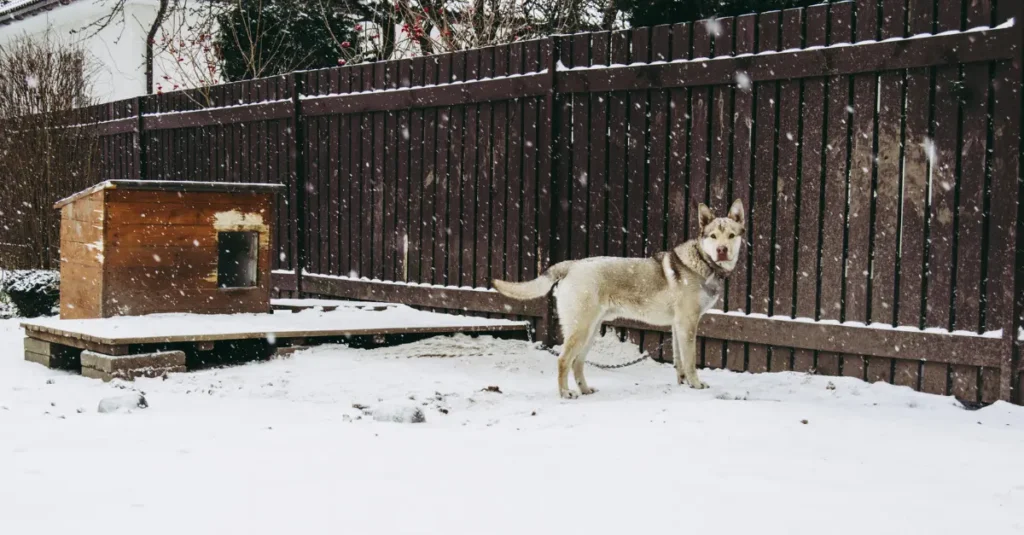
The first step is finding the best spot for the doghouse. Wind direction is the most critical factor to consider here. You should position the kennel so the door faces away from the wind. It prevents icy gusts from blowing directly into the interior. Look for natural shelter, like a solid wall or a line of trees.
These act as a windbreak for the entire structure. Sun exposure is also invaluable during the shorter winter days. Placing the kennel in a sunny spot helps naturally warm the exterior. It is a simple way to keep a dog warm in outside kennel spaces without extra costs.
Step 2 – Elevate the Kennel from Cold Ground
Frozen ground is a significant source of heat loss for outdoor dogs. Ground frost will pull warmth right through the kennel floor via conduction. It can also lead to moisture transfer, making the interior damp and cold.
To prevent this, you must raise the facility a few inches. Simple elevation methods include using bricks, cinder blocks, or wooden pallets. Creating this air gap keeps the floor dry and frost-free. It is one of the most effective ways to keep dogs warm in kennel setups.
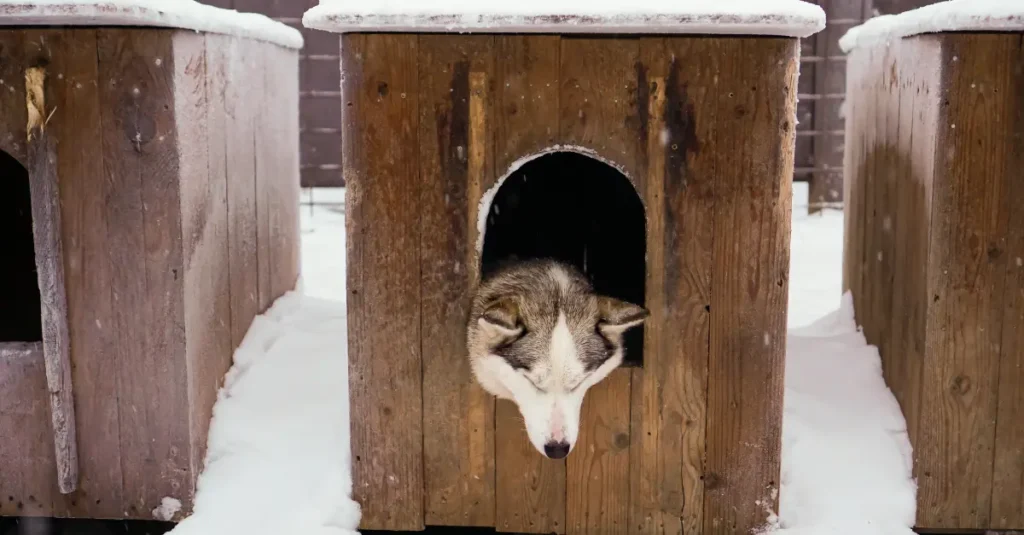
Step 3 – Enclose the Kennel Properly
This step follows the enclosure principles explained above. Practically, applying an enclosure means sealing any gaps where air might leak. Heavy-duty door flaps are the best tool for this job.
They allow the dog to enter easily, but close behind them to trap heat. You must decide between a partial or complete enclosure based on your climate. A full enclosure provides the most protection against driving snow and rain. Learning how to enclose a dog kennel for winter properly is vital for total warmth.
Step 4 – Insulate the Kennel Correctly
This step builds on the earlier explanation of insulation. You should add insulation to the walls, roof, and even the floor. Focus on using safe materials, such as foam boards or reflective foil liners.
Make sure these are tucked away so your dog cannot chew on them. Avoiding moisture traps is a key part of this process. If insulation gets wet, it will actually make the kennel colder. Properly installed layers will reflect body heat to your pet. This is the ultimate method for insulating a dog kennel for winter.
Step 5 – Add Proper Winter Bedding
Choosing the right bedding material can save your dog’s life in winter. Straw is far superior to blankets for outdoor use. Blankets absorb moisture and can freeze, which is very dangerous. Straw is hollow and traps warm air, providing excellent natural insulation.
You should use a thick layer so your dog can burrow down. Checking for dryness is a daily task during winter. Wet bedding must be replaced immediately to keep the dog safe. Finding the best winter bedding for a dog kennel ensures a cozy night.
Step 6 – Seal Against Wind, Snow, and Moisture
A good winterized kennel should be made windproof and water-tight. Start by checking the roof for any small leaks or gaps. The areas should be protected with weather-resistant caulking and heavy-duty tarps.
Proper drainage needs to be established for the area because it requires dry conditions. The kennel entrance should remain protected from melting snow and rainwater. Last but not least, snow should be prevented from entering the entrance through a deep overhang or porch. The system maintains interior dryness and security year-round.
Step 7 – Maintain Safe Airflow
It is vital to provide fresh air even in the coldest weather. You must place vents in areas that do not create a direct draft on the dog. Proper vent placement allows stale air to escape without cooling the kennel too much. This airflow is critical for condensation prevention inside the house.
If moisture from a dog’s breath builds up, it can make the bedding damp. Dampness will quickly pull heat away from your pet. A small amount of steady airflow keeps the environment healthy and dry.
Step 8 – Use Software to Manage Winter Kennel Care
Managing an outdoor kennel requires consistent daily attention and planning. You can use modern tools, such as Kennel Management Software, to stay organized. This type of software can help you create digital winter checklists. You can also use it to track temperature throughout the season.
Weather alerts can be sent directly to your phone for sudden storms. Maintenance reminders ensure you never forget to check insulation or change bedding. Using technology makes it much easier to keep your dog safe.
How to Keep a Dog Warm Overnight in Winter
The temperature at night drops to dangerous levels, endangering your pet’s safety. The air outside starts to lose its daytime heat when the sun sets. You should solve this problem by adding more insulation to your facility during nighttime hours. You can use heavy moving blankets or dedicated thermal blankets to protect the kennel from outside elements.
The process requires you to complete two essential tasks, which include checking for dog safety before bedtime. Make sure your dog is dehydrated while their bedding maintains its fluffy appearance. The final steps provide you with complete knowledge about how to keep a dog warm overnight in winter.
- Monitor temperature drops: Be aware of how low the night temperature will fall.
- Add night layers: Use extra external covers to trap even more body heat
- Verify dryness: Check that the dog and bedding are not damp before dark
- Final door check: Ensure the door flap is secure to block the night wind
Safe Ways to Heat a Dog Kennel (If Needed)
There are times when even a perfect system needs extra help. You must determine when supplemental heating is vital based on extreme weather. It is critical to understand the difference between safe and unsafe heating methods. Never use household space heaters, as they pose severe fire and shock risks.
Instead, look for products specifically designed for pet safety, such as low-wattage heated pads. These should have chew-proof cords to prevent accidental injury. Learning how to heat a dog kennel safely in winter is about choosing tools that minimize risk.
Common Winter Kennel Mistakes Dog Owners Make
Many pet owners make common mistakes that can put their dogs at risk during the winter. Over-sealing the kennel is one of the most common mistakes because it prevents air from entering and exiting, leading to moisture accumulation.
It can lead to damp bedding, which may make your dog very easily chilled. Another significant error that poses a risk of dangerous fire and shock is using unsafe heaters. Lastly, neglecting airflow can lead to condensation forming within the kennel. These are the pitfalls to avoid to keep dogs warm, both outside and in kennels, during the cold season.
Final Winter Kennel Checklist for Dog Owners
You now have a complete plan to ensure your dog stays safe and warm all season long. Keeping dogs warm in kennels is easily manageable when you follow a consistent system. This checklist serves as a simple recap to build your confidence before the first freeze hits.
Remember that safety is the most important part of any winter setup. You should verify that the kennel is in a sheltered location away from the wind. Make sure the house is elevated from the frozen ground to prevent moisture. Confirm that you have properly enclosed the doorway and added sufficient insulation. Finally, always check that your dog has fresh, dry straw for their winter bedding. Following these steps ensures your pet remains cozy even on the coldest nights.
FAQs about Warming a Dog in Winter
1. How cold is too cold for a dog to stay outside overnight?
It depends on the breed, size, and coat type. Short-haired and small dogs struggle at temperatures below freezing, while larger, double-coated breeds tolerate cold better; however, extreme temperatures are unsafe for any dog.
2. Can I use blankets instead of straw in an outdoor kennel?
Blankets can hold moisture and freeze in winter. Straw is usually safer because it stays dry longer and traps warm air more effectively.
3. Should I bring my dog inside during severe winter storms?
Yes. During heavy snow, ice storms, or extreme wind chills, bringing your dog indoors is the safest option, even with a winterized kennel.
4. How often should I check the kennel in winter?
You should check it daily. Make sure bedding is dry, insulation is intact, and no snow or moisture has entered the space.
5. Do all dog breeds handle winter the same way?
No. Huskies and similar breeds are built for cold weather, while short-haired, senior, or small dogs need extra protection and closer monitoring.